Hello all my friends out there in blog land. First I want to let you know that
this is not an original idea. Yes, I saw it on another blog and now I can't find it again!!!
So I'm posting this to help you in case you can't find it either and I've now got
a plan for next time I find something on a blog that I try.
If this was you're original idea please, please let me know you're blog so I can link it here!
This is what you're gonna need.
mod podge or decoupage finish.
crystal effects
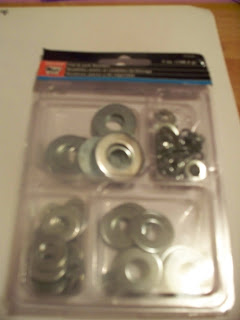
washers
paint brush
exacto knife
leather or this cord I found at WM too they had no leather.
emery board or files
scrap paper

I found this vast array of washers in all sizes at Wal Mart for right at 2.00
Take your washers and paint your decoupage or mod podge on one side
then glue them down to your scrap paper. Let dry.

I did several sets at one time.

After they have dried completely take your exacto knife and cut
the centers and around outside edge.

Now take your file and file around the center paper and around outside
edge to knock off the rough edges.

Here is where I experimented for you. I tried several different things
to seal them with just to see if anything else would work.
The clear elmers glue seemed to be a good idea but the paper pretty much
just absorbed into the paper so it's a no go unless you would want
to try letting it dry and putting on another coat but I didn't try that.

The sculpey glaze I had on hand so tried it and it worked pretty good at first
but then the next morning had pulled on the edges of the paper so It also is
pretty much a no go.

So.......You pretty much have only one choice out of the three
I tried and that's the stampin up Crystal Effects. It's a great product
doesn't run off the edges and gives a rounded finish to the item.

Now you just take your leather and loop it through the large ring, and
I got some earring hoops from Micheals and just put the small washers on
the rings.
And these are my finished products after I recovered all the trials with
the Crystal effects.

Please remember this is not an original idea and if you happen to find
the blog this was posted on please let me know.


 Another shot of cabinets above the stove Notice the vent hood is NOT
 This area is dividing my living room from my kitchen it's just a counter
 Below you'll see the countertop DH made for me
 Just threw in a pic of the wonderful shelf hubby put up for me too. All in all I'm
 And that's what we've been up to the week of my Birthday!!!


